What is NSoT?
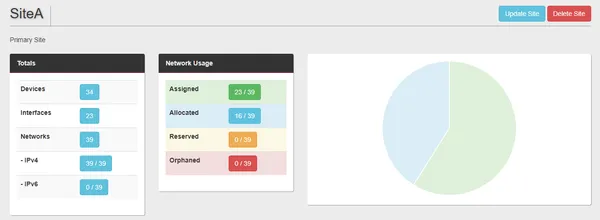
Network Source of Truth (NSoT) is a Django based opensource application for the management of IP addresses (IPAM), network devices and network interfaces.
NSoT provides the following for the administration of the database inventory:
- REST-based API
- CLI client
- Python modules
- UI
As you will shortly see the true benefit of NSoT comes with being able to easily add metadata/attributes and perform various query/filters on your datasets.
NSoT Installation
The architecture of NSoT is based upon the installation of the NSoT service which provides the UI and API. A client - pynsot - is then installed, and used for the interaction with the NSoT API via either a CLI client or Python modules.
Install Service
The easiest way to install the service is via Docker, then once the container is running a superuser is created.
$ docker run -p 8990:8990 -d --name=nsot nsot/nsot start --noinput
$ docker exec -it nsot bash
# nsot-server --config=/etc/nsot/nsot.conf.py createsuperuser —email admin@nsot.local
Further details around installing NSoT can be found at NSoT.readthedocs.io/en/latest/install/docker.html
Install PyNSoT
Using Python2.7 install pynsot like so,
pip install pynsot
Further details around installing pynsot can be found at pynsot.readthedocs.io/en/latest/#installation
Objects and Resources
The NSoT datamodel is comprised of various object-types, such as:
- Sites
- Attributes
- Resources
- Users
- Permissions
We have the following resource types:
- Devices
- Networks
- Interfaces
- Circuits
- ProtocolTypes
- Protocols
Based on the above, a site is created, and the various resource types are created within the site. Custom attributes can also be created for our site and resources, for example for a device resource - os_version, vendor, vun_cve etc.
Listing Resources
First of all, let us list our devices, like so. As you can see I have created some attributes for my device resource.
# nsot devices list | head -n 30
+----------------------------------------------------------------------------------+
| ID   Hostname (Key)   Attributes                                                 |
+----------------------------------------------------------------------------------+
| 14   access-sw-001    hw_type=switch                                             |
|                       model=qfx1000                                              |
|                       position=u8                                                |
|                       rack=r1                                                    |
|                       vendor=juniper                                             |
| 15   access-sw-002    hw_type=switch                                             |
|                       model=qfx1000                                              |
|                       position=u9                                                |
|                       rack=r1                                                    |
|                       vendor=juniper                                             |
| 16   access-sw-003    hw_type=switch                                             |
|                       model=qfx1000                                              |
|                       position=u10                                               |
|                       rack=r1                                                    |
|                       vendor=juniper                                             |
| 17   access-sw-004    hw_type=switch                                             |
|                       model=qfx1000                                              |
|                       position=u11                                               |
|                       rack=r1                                                    |
|                       vendor=juniper                                             |
| 18   access-sw-005    hw_type=switch                                             |
|                       model=qfx1000                                              |
|                       position=u12                                               |
|                       rack=r1                                                    |
|                       vendor=juniper                                             |
| 9    core-rtr-001     hw_type=router                                             |
|                       model=asr1000                                              |
Let’s list our networks as well.
# nsot networks list
+---------------------------------------------------------------------------------------------------------+
| ID   CIDR (Key)      Is IP?   IP Ver.   Parent        State       Attributes                            |
+---------------------------------------------------------------------------------------------------------+
| 5    10.0.0.0/8      False    4         None          allocated   description=super_block               |
|                                                                   vlan_desc=none                        |
|                                                                   vlan_id=none                          |
|                                                                   vlan_name=none,vrf=none               |
| 6    10.1.0.0/16     False    4         10.0.0.0/8    allocated   description=infra_block               |
|                                                                   vlan_desc=none                        |
|                                                                   vlan_id=none                          |
|                                                                   vlan_name=none,vrf=none               |
| 41   10.1.0.144/29   False    4         10.1.0.0/16   allocated   description=backup                    |
|                                                                   vlan_desc=oob-mgmt                    |
|                                                                   vlan_id=104                           |
|                                                                   vlan_name=VLAN-104-BACKUP             |
|                                                                   vrf=infra                             |
| 7    10.1.1.0/24     False    4         10.1.0.0/16   allocated   description=vmotion                   |
|                                                                   vlan_desc=vmotion                     |
|                                                                   vlan_id=100                           |
|                                                                   vlan_name=VLAN-100-VMOTION,vrf=infra  |
Creating a Device
Let’s now create a device object:
# nsot devices add --hostname access-sw-010 \
                   --attributes rack=r1 \
                   --attributes position=u20 \
                   --attributes vendor=dell \
                   --attributes model=n3048 \
                   --attributes hw_type=switch
[SUCCESS] Added device!
Querying and Filtering
NSoT provides some pretty cool features to allow you to select which data you want to see from your datasets. These features come in the form of queries and filters.
Filters
Filters allow you to match based upon attributes. As shown below, where we are select the attributes of rack and hw_type and the values we are interested in.
#  nsot devices list -a rack=r1 -a hw_type=switch -a vendor=dell
+--------------------------------------+
| ID   Hostname (Key)   Attributes     |
+--------------------------------------+
| 40   access-sw-010    hw_type=switch |
|                       model=n3048    |
|                       position=u20   |
|                       rack=r1        |
|                       vendor=dell    |
+--------------------------------------+
Queries
Queries allow you to perform set operations against your attributes and output the matching hostnames. Below provides an example, based on the logic,
provide all devices within rack r1, excluding a vendor type of cisco.
# nsot devices list -q 'rack=r1 -vendor=cisco'
access-sw-001
access-sw-002
access-sw-003
access-sw-004
access-sw-005
access-sw-010
dcgw-001
dcgw-002
mgmt-sw-001
Full details around the NSoT queries can be found at pynsot.readthedocs.io/en/latest/cli.html#set-queries
NSoT Python Module
Let’s now dive into the Python module.
Imports
First let's perform our imports.
from pprint import pprint as pp
from pynsot.client import get_api_client
c = get_api_client()
Note: pprint is used to display the output in a readable format, and is a separate module, i.e not part of the NSoT project.
Fetching the Next Network or Address
Now we have import pynsot, we can obtain the next set of addresses from a given network.
Like so,
>>> pp(c.sites(7).networks('10.1.5.0/24').next_address().get(num=10))
[u'10.1.5.21/32',
 u'10.1.5.22/32',
 u'10.1.5.23/32',
 u'10.1.5.24/32',
 u'10.1.5.25/32',
 u'10.1.5.26/32',
 u'10.1.5.27/32',
 u'10.1.5.28/32',
 u'10.1.5.29/32',
 u'10.1.5.30/32']
We can also do the same for obtaining the next set of networks. Like so,
>>> pp(c.sites(7).networks('10.1.0.0/16').next_network().get(prefix_length=29,num=20))
[u'10.1.0.0/29',
 u'10.1.0.8/29',
 u'10.1.0.16/29',
 u'10.1.0.24/29',
 u'10.1.0.32/29',
 u'10.1.0.40/29',
 u'10.1.0.48/29',
 u'10.1.0.56/29',
 u'10.1.0.64/29',
 u'10.1.0.72/29',
 u'10.1.0.80/29',
 u'10.1.0.88/29',
 u'10.1.0.96/29',
 u'10.1.0.104/29',
 u'10.1.0.112/29',
 u'10.1.0.120/29',
 u'10.1.0.128/29',
 u'10.1.0.136/29',
 u'10.1.0.144/29',
 u'10.1.0.152/29']
Create Network
Ok, so let’s create a network. We will then perform the next_networks again to ensure that the network is no longer available.
First, we define our network via a dict().
>>> net = {
  'attributes': {
    'description': 'backup',
    'vlan_id': '104',
    'vlan_name': 'VLAN-104-BACKUP',
    'vlan_desc': 'backup',
    'vrf': 'infra'
  },
  'network_address': '10.1.0.144',
  'prefix_length': 29
}
Next we create the network, like so:
>>> pp(c.sites(7).networks.post(net))
{u'attributes': {u'description': u'backup',
                 u'vlan_desc': u'backup',
                 u'vlan_id': u'104',
                 u'vlan_name': u'VLAN-104-BACKUP',
                 u'vrf': u'infra'},
 u'cidr': u'10.1.0.144/29',
 u'id': 41,
 u'ip_version': u'4',
 u'is_ip': False,
 u'network_address': u'10.1.0.144',
 u'parent': u'10.1.0.0/16',
 u'parent_id': 6,
 u'prefix_length': 29,
 u'site_id': 7,
 u'state': u'allocated'}
Finally we perform next_network again to ensure 10.1.0.144/29 is no longer available:
 >>> pp(c.sites(7).networks('10.1.0.0/16').next_network().get(prefix_length=29,num=20))
[u'10.1.0.0/29',
 u'10.1.0.8/29',
 u'10.1.0.16/29',
 u'10.1.0.24/29',
 u'10.1.0.32/29',
 u'10.1.0.40/29',
 u'10.1.0.48/29',
 u'10.1.0.56/29',
 u'10.1.0.64/29',
 u'10.1.0.72/29',
 u'10.1.0.80/29',
 u'10.1.0.88/29',
 u'10.1.0.96/29',
 u'10.1.0.104/29',
 u'10.1.0.112/29',
 u'10.1.0.120/29',
 u'10.1.0.128/29',
 u'10.1.0.136/29',
 u'10.1.0.152/29',
 u'10.1.0.160/29']
Debugging
In order to print debugging output the following variable can be exported.
# export PYNSOT_DEBUG=1
Below shows an example of the type of output that it can provide:
# nsot devices list -q 'rack=r1 -vendor=cisco'
DEBUG:pynsot.client:Reading dotfile.
DEBUG:pynsot.dotfile:Enforcing permissions 600 on /root/.pynsotrc
DEBUG:pynsot.client:Validating auth_method: auth_token
DEBUG:pynsot.client:Skipping 'debug' in config for auth_method 'auth_token'
DEBUG:pynsot.client:Using api_version = 1.0
DEBUG:pynsot.client:Getting token for user data: {u'secret_key': u'XXXXXXXX', u'email': 'rick@nsot.local'}
DEBUG:urllib3.connectionpool:Starting new HTTP connection (1): 172.29.236.139:8990
DEBUG:urllib3.connectionpool:http://172.29.236.139:8990 "POST /api/authenticate/ HTTP/1.1" 200 137
DEBUG:pynsot.client:Got response: <Response [200]>
DEBUG:pynsot.commands.callbacks:GOT DEFAULT_SITE: 7
DEBUG:pynsot.commands.callbacks:GOT PROVIDED SITE_ID: None
DEBUG:pynsot.app:rebase: Got site_id: 7
DEBUG:pynsot.app:rebase: Site_id found; rebasing API URL!
DEBUG:urllib3.connectionpool:Starting new HTTP connection (1): 172.29.236.139:8990
DEBUG:urllib3.connectionpool:http://172.29.236.139:8990 "GET /api/sites/7/devices/query/?grep=False&natural_key=False&query=rack%3Dr1+-vendor%3Dcisco HTTP/1.1" 200 1312
access-sw-001
access-sw-002
access-sw-003
access-sw-004
access-sw-005
access-sw-010
dcgw-001
dcgw-002
mgmt-sw-001
Other than troubleshooting, this can help massively when building the Python (along with pynsot.readthedocs.io/en/latest/python_api.html#fetching-resources) or REST API NSoT calls.


